6 Software Management
- Use the
moduletool to search for and load pre-installed software. - Describe what a package manager is, and how it can be used to manage software instalation on a HPC environment.
- Install the Mamba package manager.
- Create a software environment and install software using Mamba.
- Describe what a software container is and how it differs from a package manager.
- Download and use a pre-existing software container for bioinformatics and scientific computing applications.
6.1 Using pre-installed software
It is very often the case that HPC admins have pre-installed several software packages that are regularly used by their users. Because there can be a large number of packages (and often different versions of the same program), you need to load the programs you want to use in your script using the module tool.
The following table summarises the most common commands for this tool:
| Command | Description |
|---|---|
module avail |
List all available packages. |
module avail -a -i "pattern" or module avail | grep -i "pattern" |
Search the available package list that matches “pattern”. Note the second option is given as some versions of module do not support case-insensitive search (-i option). |
module load <program> |
Load the program and make it available for use. |
module unload <program> |
Unload the program (removes it from your PATH). |
For example, on our training HPC, you can try to run module avail to see which software is available. We can see a software called bowtie2. If we try to use this software at the moment we get an error:
bowtie2 --versionCommand 'bowtie2' not found, but can be installed with:
apt install bowtie2
Please ask your administrator.But if we load the software first, then the command works:
module load bowtie/2.5.0
bowtie2 --version
/usr/local/Cluster-Apps/bowtie/2.5.0/bowtie2-align-s version 2.5.0
64-bit
Built on login-e-12
Mon 14 Nov 12:11:12 UTC 2022
Compiler: gcc version 4.8.5 20150623 (Red Hat 4.8.5-44) (GCC)
Options: -O3 -msse2 -funroll-loops -g3 -std=c++11 -DPOPCNT_CAPABILITY -DNO_SPINLOCK -DWITH_QUEUELOCK=1
Sizeof {int, long, long long, void*, size_t, off_t}: {4, 8, 8, 8, 8, 8}If you echo $PATH, you will notice the installer has been added to your PATH variable (the environment variable that tells the shell where to find programs to run). Once you run module unload bowtie2/2.5.0, and then echo $PATH again, you notice the PATH variable will have been modified. This is how the Environment Modules package makes software available for you to use.
If a package is not available through the module command, your only option is to contact the HPC admin and ask them to install it for you. Alternatively, you can use a package manager as we show in the next section.
6.2 The Mamba package manager
Often you may want to use software packages that are not installed by default on the HPC. There are several ways you could manage your own software installation, but in this course we will be using the package manager Mamba, which is a successor to another package manager called Conda.
Conda and Mamba are package managers commonly used in data science, scientific computing, and bioinformatics. Conda, originally developed by Anaconda, is a package manager and environment manager that simplifies the creation, distribution, and management of software environments containing different packages and dependencies. It is known for its cross-platform compatibility and ease of use. Mamba is a more recent and high-performance alternative to Conda. While it maintains compatibility with Conda’s package and environment management capabilities, Mamba is designed for faster dependency resolution and installation, making it a better choice nowadays.
One of the strengths of using Mamba to manage your software is that you can have different versions of your software installed alongside each other, organised in environments. Organising software packages into environments is extremely useful, as it allows to have a reproducible set of software versions that you can use and resuse in your projects.
For example, imagine you are a data scientist working on a project that involves machine learning. You have two projects with different requirements (Figure 6.1):
- Project A: This project requires Python 3.7, NumPy 1.15, and scikit-learn 0.20, among other libraries.
- Project B: This project needs Python 3.9, the latest version of NumPy, and TensorFlow 2.0.
If you don’t use environments, you would need to install and maintain these packages globally on your system. This can lead to several issues:
- Version conflicts: different projects may require different versions of the same library. For example, Project A might not be compatible with the latest NumPy, while Project B needs it.
- Dependency chaos: as your projects grow, you might install numerous packages, and they could interfere with each other, causing unexpected errors or instability.
- Difficulty collaborating: sharing your code with colleagues or collaborators becomes complex because they may have different versions of packages installed, leading to compatibility issues.

Environments allow you to create isolated, self-contained environments for each project, addressing these issues:
- Isolation: you can create a separate environment for each project using tools like Conda/Mamba or virtualenv in Python. This ensures that the dependencies for one project don’t affect another.
- Version control: you can specify the exact versions of libraries and packages required for each project within its environment. This eliminates version conflicts and ensures reproducibility.
- Ease of collaboration: sharing your code and environment file (e.g., requirements.txt for Python) makes it easy for collaborators to replicate your environment and run your project without worrying about conflicts.
- Simplified maintenance: If you need to update a library for one project, it won’t impact others. You can manage environments separately, making maintenance more straightforward.
In the context of HPC clusters, another advantage of using Mamba is that the software is installed locally (by default in your home directory), without the need for admin permissions.
Although Mamba is a great tool to manage your own software installation, the disadvantage is that the software is not compiled specifically taking into account the hardware of the HPC. This is a slightly technical topic, but the main practical consequence is that software installed by HPC admins and made available through the module system may sometimes run faster than software installed via mamba. This means you will use fewer resources and your jobs will complete faster.
6.2.1 Installing Mamba
Before you use Mamba, you will need to install it on the HPC. If you are attending our live course, we already have Mamba installed, so you can skip this step. However, we give instructions in the box below, if you want to set this up on your environment.
The default instructions install Mamba on the user’s home. However, for Cambridge HPC users, we recommend installing Mamba on the faster storage.
Users from other institutions may want to adjust the dir_to_install variable given in the code block below, and install miniforge in a directory of their choice.
dir_to_install="$HOME/miniforge3"
wget "https://github.com/conda-forge/miniforge/releases/latest/download/Miniforge3-$(uname)-$(uname -m).sh"
bash Miniforge3-$(uname)-$(uname -m).sh -b -p $dir_to_install
rm Miniforge3-$(uname)-$(uname -m).sh
$dir_to_install/bin/mamba shell init --shell bashdir_to_install="$HOME/rds/hpc-work/miniforge3"
wget "https://github.com/conda-forge/miniforge/releases/latest/download/Miniforge3-$(uname)-$(uname -m).sh"
bash Miniforge3-$(uname)-$(uname -m).sh -b -p $dir_to_install
rm Miniforge3-$(uname)-$(uname -m).sh
$dir_to_install/bin/mamba shell init --shell bashLogout of the HPC and log back in again, to restart your terminal.
Then run the following commands:
conda config --add channels nodefaults
conda config --add channels bioconda
conda config --add channels conda-forge
conda config --set channel_priority strict
conda config --set remote_read_timeout_secs 1000
The software installation “recipes” used by Mamba are maintained by large communities of software developers. These communities are organised by channels, i.e. software repositories. Two popular channels are:
- bioconda - maintains bioinformatics software
- conda-forge - maintains several data science packages
The setup instructions given above add these channels to our Mamba setup, so that it looks for software in those repositories by default.
6.2.2 Installing software with mamba
The command used to install and manage software is called mamba. Although we will only cover the basics in this course, it has an excellent documentation and a useful cheatsheet.
conda or mamba?
Some of the documentation we point to is for conda, but as we said earlier mamba is its newer implementation, so these two commands can be used interchangeably (mostly). The easy rule-of-thumb is: whenever you see the command conda you can use mamba instead.
The first thing to do is to create a software environment for our project. Although this is optional (you could instead install everything in the “base” default environment), it is a good practice as it means the software versions remain stable within each project.
To create an environment we use:
mamba create --name ENVWhere “ENV” is the name we want to give to that environment. Once the environment is created, we can install packages using:
mamba install --name ENV PROGRAMWhere “PROGRAM” is the name of the software we want to install.
One way to organise your software environments is to create an environment for each kind of analysis that you might be doing regularly. For example, you could have an environment named imaging with software that you use for image processing (e.g. Python’s scikit-image or the ImageMagick package) and another called deeplearn with software you use for deep learning applications (e.g. Python’s Keras).
In some situations (in particular in bioinformatics), software packages can have a very large number of software dependencies leading to incompatibilities across packages. In those situations, it may be best to have a separate environment for each software.
To search for the software packages that are available through mamba:
- go to anaconda.org.
- in the search box search for a program of your choice. For example: “bowtie2”.
- the results should be listed as
CHANNEL/PROGRAM, where CHANNEL will the the source repository from where the software is available. Usually scientific/bioinformatics software is available through theconda-forgeandbiocondachannels.
You can specify the channel explicitly during the install command using the -c option. For example mamba install --channel CHANNEL --name ENV PROGRAM.
Let’s see this with an example, where we create a new environment called “datasci” and install some python packages for data science work:
mamba create --name datasci
mamba install --name datasci --channel conda-forge numpy=1.26.4 matplotlib=3.8.3
Note that, in this case, we were explicit in specifying the version of each software we want. This is recommended for reproducibility of analysis and can make environments more stable to manage. If you don’t specify the version you want, then Mamba will install the latest version that is compatible with your environment.
To see all the environments you have available, you can use:
mamba env list# conda environments:
#
base * /home/participant36/mambaforge
datasci /home/participant36/mambaforge/envs/datasciIn our case it lists the base (default) environment and the newly created datasci environment. The asterisk (“*“) tells us which environment we’re using at the moment.
6.2.3 Loading Mamba environments
Once your packages are installed in an environment, you can load that environment by using mamba activate ENV, where “ENV” is the name of your environment. For example, we can activate our previously created environment with:
mamba activate datasciIf you chech which python executable is being used now, you will notice it’s the one from this new environment:
which python~/mambaforge/envs/datasci/bin/pythonYou can also check that the new environment is in use from:
mamba env list# conda environments:
#
base /home/participant36/mambaforge
datasci * /home/participant36/mambaforge/envs/datasciAnd notice that the asterisk “*” is now showing we’re using the datasci environment.
To load environments in a shell script that is being submitted to SLURM, you need to first source a configuration file from Mamba. For example, to load the datasci environment we created, this would be the code:
# Always add these two commands to your scripts
eval "$(conda shell.bash hook)"
source $CONDA_PREFIX/etc/profile.d/mamba.sh

# then you can activate the environment
mamba activate datasci
This is because when we submit jobs to SLURM the jobs will start in a non-interactive shell, and mamba doesn’t get automatically set. Running the source command shown will ensure mamba activate becomes available.
6.2.4 Exercise: mamba environments
Make sure you are in the workshop folder (cd ~/rds/hpc-work/hpc_workshop).
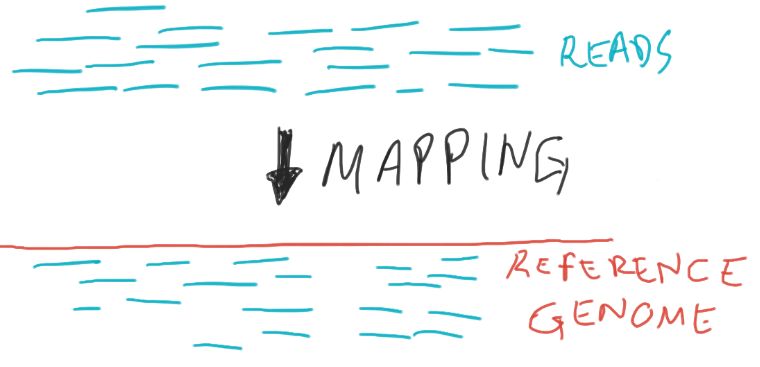
In the data folder, you will find some files resulting from whole-genome sequencing individuals from the model organism Drosophila melanogaster (fruit fly). Our objective will be to align our sequences to the reference genome, using a software called bowtie2.
But first, we need to prepare our genome for this alignment procedure (this is referred to as indexing the genome). We have a file with the Drosophila genome in data/genome/drosophila_genome.fa.
- Create a new Mamba environment named “bioinformatics”.
- Install the
bowtie2=2.5.3program in your new environment. - Activate the new environment.
- Check that the software installed correctly by running
which bowtie2andbowtie2 --help. - Open the script in
job_scripts/drosophila_genome_indexing.shand edit the#SBATCHoptions with the word “FIXME”. Submit the script to SLURM usingsbatch, check it’s progress, and whether it ran successfully. Troubleshoot any issues that may arise.
6.3 Containers
Containers are a technology that can be used to create and manage computational environments. A container is a lightweight, standalone executable package that contains everything needed to run a piece of software, including the operating system, libraries, and application code. Containers are isolated from the host system, meaning that they can run the same software in different environments without conflicts or interference. By using containers, researchers can ensure that their code runs consistently across different systems and platforms, without having to worry about dependencies or conflicts with other software on the host system.
We will focus on one of the most popular container platforms for cluster systems: Singularity. Singularity is a free and open-source computer program that performs operating-system-level virtualization also known as containerization. Singularity is also designed to create and manage isolated environments as Docker, which is another popular and widely used container platform (i.e. images created with docker can be compatible with Singularity and vice versa)*.
There are some key differences between Docker containers and Singularity containers. The most important being the necessary permission level of the containers. Docker containers run as root by default, which means that they have full access to the host system. While this can be advantageous in some cases, it can also pose security risks, particularly in multi-user environments. Singularity, on the other hand, runs containers as non-root users by default, which can improve security and prevent unauthorized access to the host system. Singularity is specifically designed for use in HPC environments and can run on a wide variety of platforms and systems without root access.
TL;TR:
- Docker is well-suited for building and distributing software across different platforms and operating systems
- Singularity is specifically designed for use in HPC environments and can provide improved security and performance in those settings.
6.3.1 Singularity installation
Typically, Singularity is pre-installed on HPC servers by the system administrators, and we recommend that you use the version installed by your system admins.
Although it is possible to install it yourself (e.g. with Mamba), we have found this to be a less reliable way to setup Singularity on a HPC. This is because it requires further configuration to interact with the filesystem (in particular as we submit jobs to SLURM).
6.3.2 Singularity images
Although you can build your own Singularity images, for many popular software there are already pre-built images available from public repositories. Some popular ones are:
For example, let’s consider the SeqKit program, which is a toolkit for manipulating FASTA/Q files. If we search on either of those websites, we will see this software is available on both. In this case, the version on Sylabs (here) is older than the one on the Galaxy server (at the time of writing we have 2.8.0 available).
Therefore, let’s consider the file on the Galaxy server. First, go to depot.galaxyproject.org and search for the software of interest (use Ctrl + F to find the text of interest). When you find the software and version of interest, right-click the file and click “Copy Link”. Then use that link with the singularity pull command:
# create a directory for our singularity images
mkdir images

# download the image
singularity pull images/seqkit-2.8.0.sif https://depot.galaxyproject.org/singularity/seqkit%3A2.8.0--h9ee0642_0
Here, we are saving the image file as seqkit-2.8.0.sif (.sif is the standard extension for singularity images). Once we have this image available, we are ready to run the software, which will see in practice with the exercise below.
6.3.3 Exercise: running singularity
6.4 Summary
- The
moduletool can be used to search for and load pre-installed software packages on a HPC.- This tool may not always be available on your HPC.
- To install your own software, you can use the Mamba package manager.
- Mamba allows you to have separate “software environments”, where multiple package versions can co-exist on your system.
- Use
mamba env create ENVto create a new software environment andmamba install -n ENV PROGRAMto install a program on that environment. - Use
mamba activate ENVto “activate” the software environment and make all the programs installed there available.- When submitting jobs to
sbatch, always remember to includesource $CONDA_PREFIX/etc/profile.d/mamba.shat the start of the shell script, followed by themamba activatecommand.
- When submitting jobs to
- Software containers can be a reliable alternative to Mamba environments, with many pre-existing containers available at Sylabs and depot.galaxyproject.org.
- To download a software container from public repositories, use the
singularity pullcommand. - To run a command within the software container, use the
singularity runcommand.
Further resources:
- Search for Mamba packages at anaconda.org.
- Learn more about Conda from the Conda User Guide.
- Conda Cheatsheet (PDF).